How to clean audio in video files
How to clean audio in video files?
This guide will show you how to clean or edit the audio inside a video file.
Let’s say you have a video, but you’re not satisfied with the sound quality — maybe it has background noise, or maybe you want to apply certain effects or adjustments.
So how do you fix it?
I’ll present a simple and fast method that I personally use.
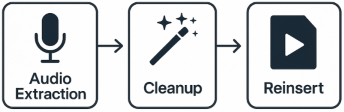
The process consists of three steps:
- Extract the audio from the video file
- Edit / clean the audio
- Reinsert the cleaned audio back into the video
Requirements
- FFmpeg installed (we will use FFmpeg, a powerful command-line tool that allows us to quickly extract and replace audio tracks inside video files)
- Any audio editing software (one of the following):
- Audacity (free)
- DAW (like Reaper, Adobe Audition, Ableton Live, etc)
- iZotope RX
Inspect Audio Tracks in a Video
Before extracting audio, check how many audio tracks the video contains:
1 | ffmpeg -i input.mp4 |
You will see something like:
1 | Stream #0:1: Audio: ... |
These represent:
0:a:0→ first audio track0:a:1→ second audio track0:a:2→ third audio track
Some videos contain multiple tracks: microphone, system audio, backup tracks, etc.
Identify Which Track Contains the Microphone
You can determine the microphone track using:
A. Using VLC Player
- Open the video in VLC
- Go to Audio → Audio Track
- Switch between tracks until you find the microphone-only track
4.Note the track number (Track 1, Track 2, etc.)
Track numbering in VLC:
- Track 1 ≈ 0:a:0
- Track 2 ≈ 0:a:1
- Track 3 ≈ 0:a:2
B. Using FFplay (Recommended)
Listen to each track individually:
1 | ffplay -i input.mp4 -map 0:a:0 |
C. Export All Tracks
1 | ffmpeg -i input.mp4 -map 0:a:0 -c copy track0.m4a |
Listen and identify which one is the microphone.
Extract the Audio Track You Want to Edit
Example: microphone is 0:a:1:
1 | ffmpeg -i input.mp4 -map 0:a:1 -acodec pcm_s16le audio_raw.wav |
Using WAV ensures no compression → best for editing.
Edit the Audio
Recommended steps:
- Noise Reduction
- EQ (speech clarity)
- Compression
- De-essing (optional)
- Normalization (optional)
- Limiter (optional)
Export as:
1 | audio_clean.wav |
Reinsert Cleaned Audio (Replace Audio)
Merge video + cleaned audio without re-encoding the video:
1 | ffmpeg -i input.mp4 -i audio_clean.wav -c:v copy -map 0:v:0 -map 1:a:0 output_final.mp4 |
- Video is kept untouched
- Audio is replaced
Meaning:
- c:v copy → keep video untouched (no quality loss)
- map 0:v:0 → use the video stream from the original file
- map 1:a:0 → use the cleaned audio track
This replaces the original audio if the video had only one track.
Replace Only ONE Track and Delete ALL Original Audio
If your video has multiple audio streams (e.g., microphone + system audio + backup), and you want ONLY your cleaned track to remain:
1 | ffmpeg -i input.mp4 -i audio_clean.wav -c:v copy -c:a aac -map 0:v -map 1:a output_final.mp4 |
This produces:
- Video (original)
- ONLY the cleaned audio
- All original audio tracks removed
Explanation:
- map 0:v → keep only the video stream
- map 1:a → keep only the cleaned audio, removing all original audio tracks
- All other tracks (0:a:0, 0:a:1, 0:a:2, etc.) are ignored/removed
- Output contains video + your cleaned audio only
This works even if the original video had:
- 2 audio tracks
- 3 audio tracks
- 10 audio tracks
Everything is removed except the cleaned one.
Keep Some Tracks, Remove Others
Example: keep only microphone (0:a:1), remove others:
1 | ffmpeg -i input.mp4 -map 0:v -map 0:a:1 -c:v copy -c:a aac output_filtered.mp4 |
Replace Only the Microphone Track but Keep Others
- Keep system audio (0:a:0)
- Replace only microphone audio (0:a:1) with cleaned version
1 | ffmpeg -i input.mp4 -i audio_clean.wav -map 0:v -map 0:a:0 -map 1:a -c:v copy -c:a aac output_mix.mp4 |
Audio tracks become:
- System audio (original)
- Microphone audio (cleaned)
Summary Table
| Task | Command |
|---|---|
| Extract mic track | -map 0:a:X -acodec pcm_s16le audio.wav |
| Insert cleaned audio | -map 0:v -map 1:a |
| Replace all audio | -map 0:v -map 1:a |
| Keep selected tracks | -map 0:a:X |
Final Notes
- FFmpeg never reduces video quality when using
-c:v copy. - You can process dozens of videos using a batch script if needed.
- This workflow is used in real studios: extract → clean → reinsert.